Idea to Image: Finally
 |
'Finally' (detail), 2016-17
acrylic on canvas, 36 x 36 x 1.5"
|
I began this painting last summer, exactly one year ago. It sat unfinished for half a year until the beginning of this month. The composition was completely overhauled; originally this painting featured a family of five tiny house sparrows. I loved the birds in this image, but couldn't find a way to make it feel 'finished.' They were lost on the large and heavily patterned canvas. Inspiration struck in May when a pair of barred owls took up our backyard as their home. My neighbors captured some great images from their back porch and about a week later, the same owls perched outside our guestroom! I've never seen an owl so close before. I drew directly from those photos and inserted the drawings into my unfinished painting from last summer. The rest of the greenery was inspired by my garden.


On the left is the original state of this painting, as I left it in December 2016.
The image on the right shows the final state of the painting, finished July 2017.
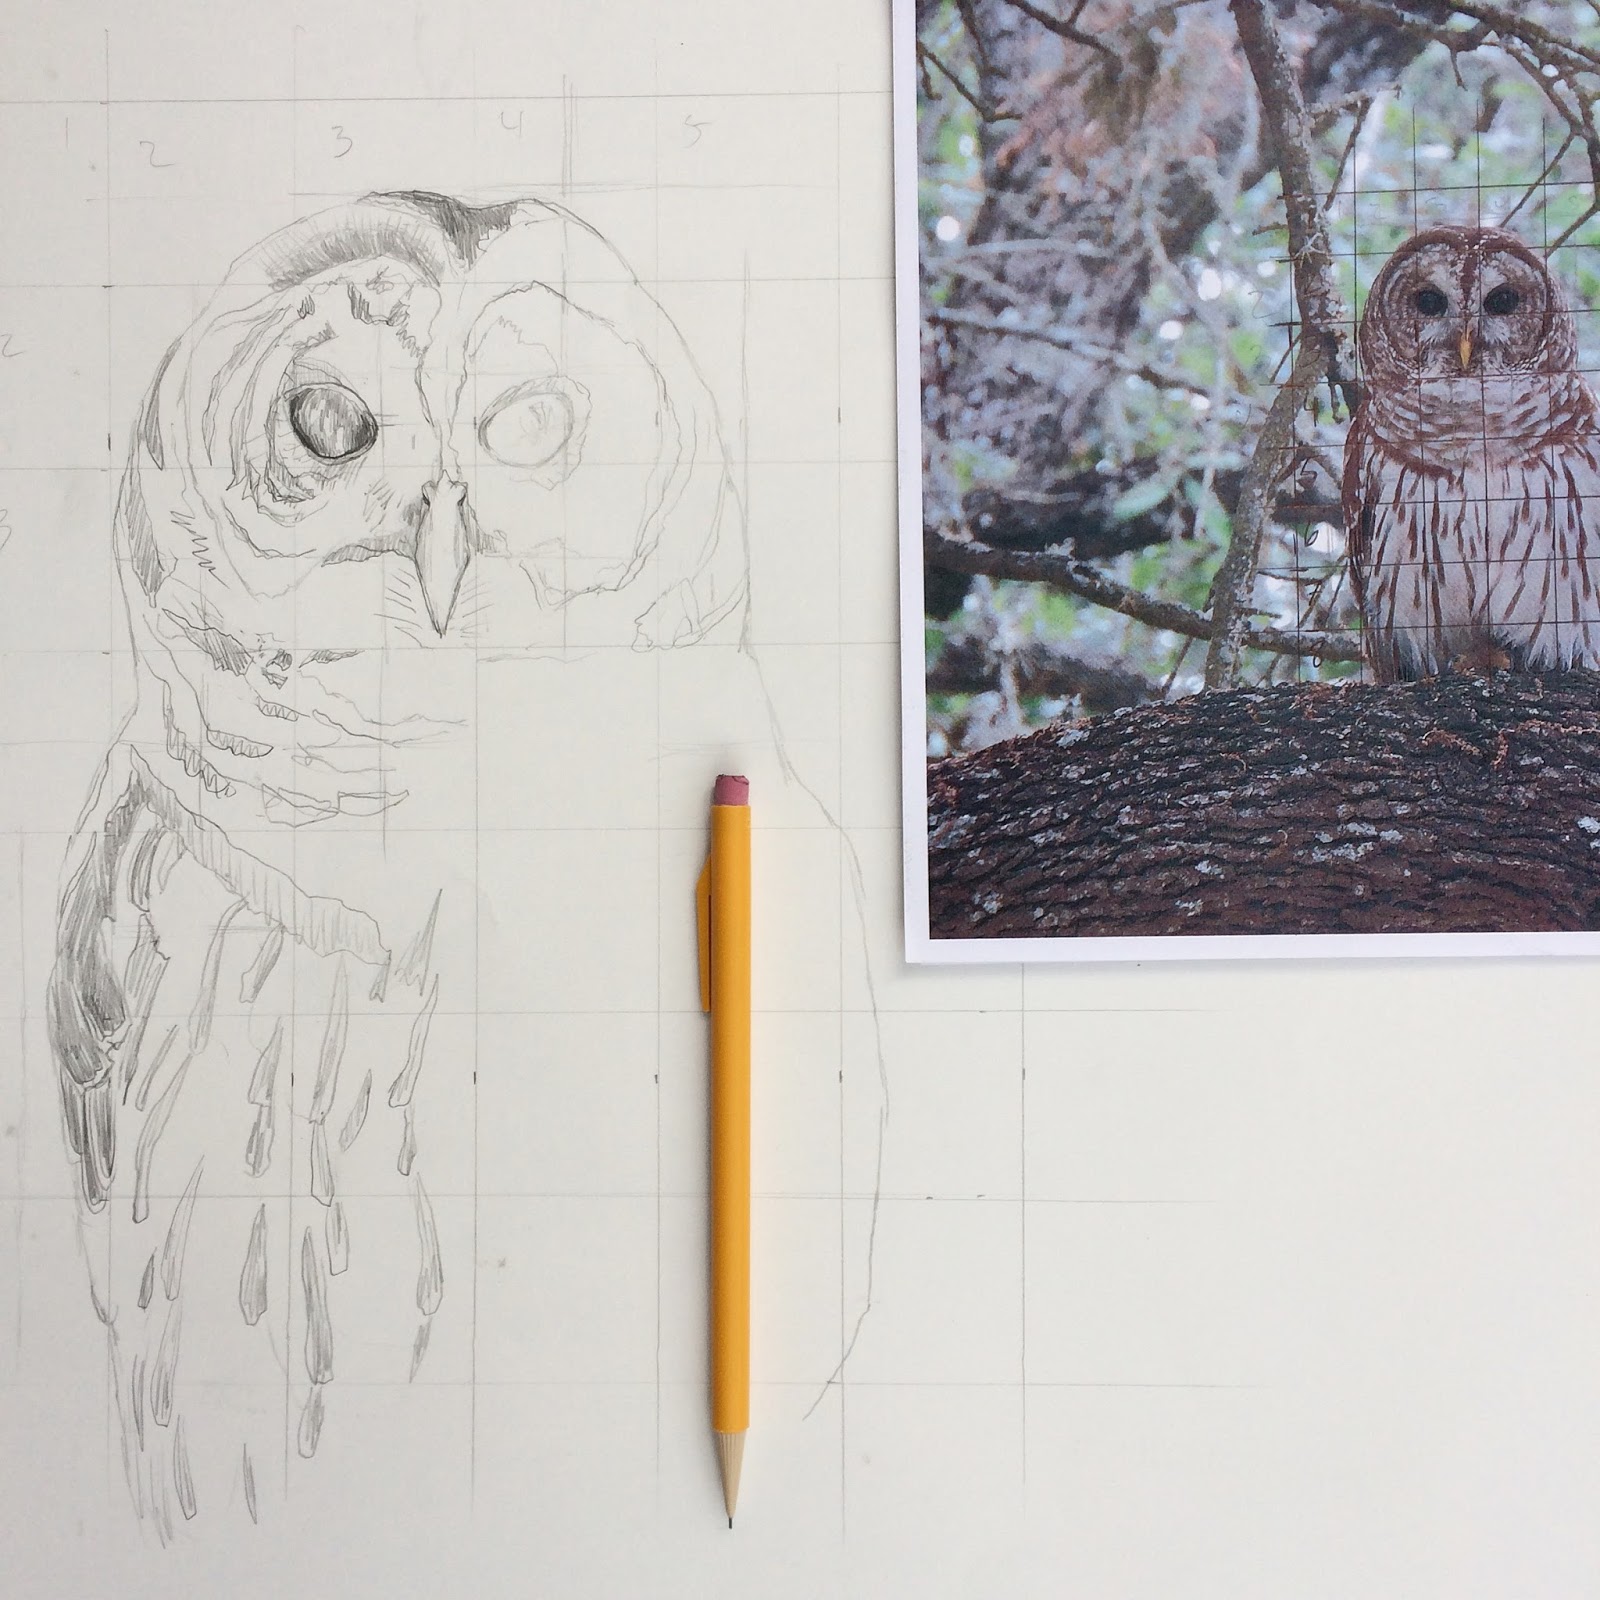

Step 1: I drew a half-inch grid over the photos and a one-inch grid on my drawing paper. The grid aided in maintaining the proportions and markings as I enlarged the image. The owl perched outside our window was very curious and sat there for at least ten minutes while we watched and took pictures. Each drawing measures 8 inches tall, the largest birds I have done so far. It was the perfect size for this three foot square canvas.
 |
| Step 2: I whited out some of the original imagery and transferred the sketches to tracing paper so I could move them around on the surface. Once I found the right placement, I taped down the drawings & transferred the key lines using carbon paper. The owls were blocked out in grisaille (mixed using a combination of ultramarine blue, raw umber, deep magenta and white) |


Step 4: The dog days of summer. Charlie and Saddler love to be in my studio, but they never watch me paint. Mostly they sleep and wait for me to give them rawhides.

Step 5: The ferns are chalked in throughout the scene to establish visual rhythm, add texture and break up the heaviness of the darker leaves.

Step 6: Detail work. The marks on the fern are similar to the marks I used to paint the feathers on the owl. The background is dotted with white and fluorescent yellow inks.
 |
Nearing the end of the painting, I took my easel outside to get some fresh air. This also helped me to see where the caladium needed more contrast in value to create movement.  Considering how long it took me to reconcile this painting, I am happy with the outcome. I don't typically start a work without knowing where it will end. The painting was finished July 12th and is currently on view at the President's Office in Manzanillo Hall at Northwest Vista College. Nine of my most recent paintings and drawings are on display there for the next school year. |

I love the outcome of your painting
ReplyDeleteI can't wait to Visit Northwest Vista College to see your art in person!
ReplyDelete